





Azure DevOps
Kualitee’s Azure DevOps integration enables two-way synchronization of Requirements, Issues, Bugs, Impediments, and Test Cases between Kualitee and Azure DevOps.
The integration can be configured using either OAuth authentication or a Personal Access Token (PAT). OAuth provides a secure authentication method using a Microsoft Entra application, while PAT authentication allows users to connect using an Azure DevOps Personal Access Token.
To configure the integration, you must have the required permissions in Kualitee and Azure DevOps.

To configure the two-way Requirement integration between Kualitee and Azure, you need admin access on the tools.
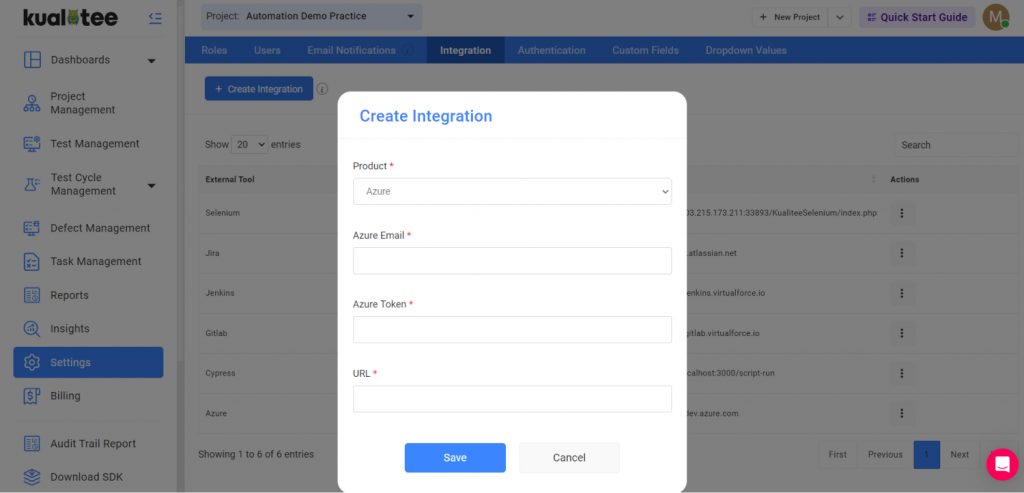
Go to Settings and select Integration from the top bar
Go to ‘Create New’ in the external tool integration listing
Select Azure tool from the drop-down menu
Enter your Azure Email, Azure token and Azure URL
Click ‘Save’ button to confirm a successful integration.
Once the integration is created, the next step is to map projects.
Under the Azure Projects, you will see the list of projects you have in Azure. While in the Kualitee project Go to Settings and Click on Edit button against azure integration Click on Map Project button
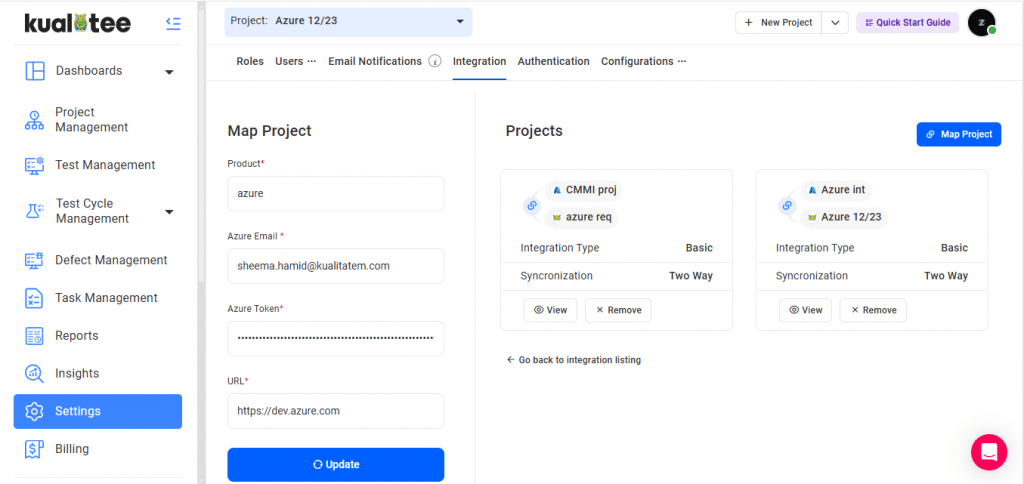
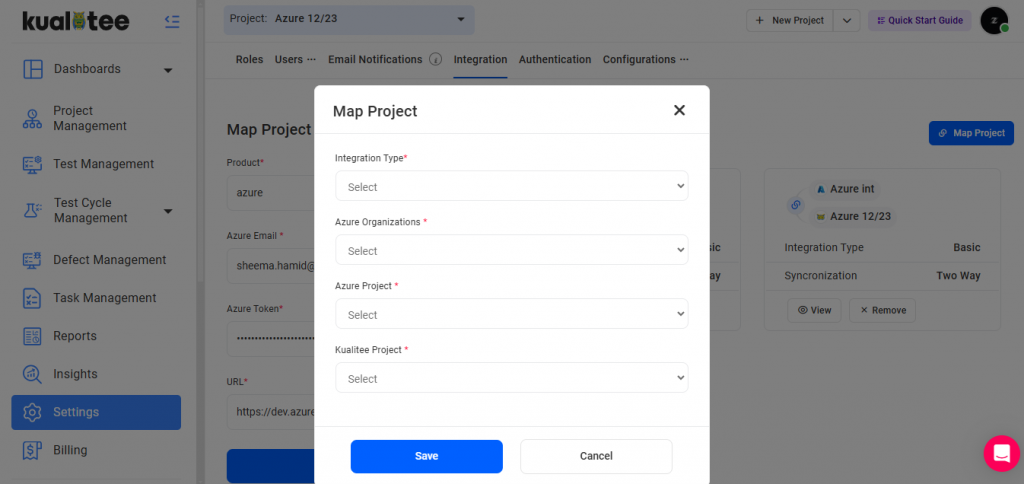
Select Integration Type, Azure Organizations, Azure project and Kualitee Project.
Click On Save button save the project mapping
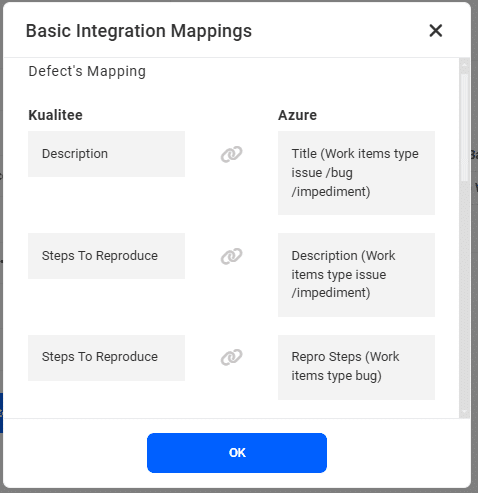
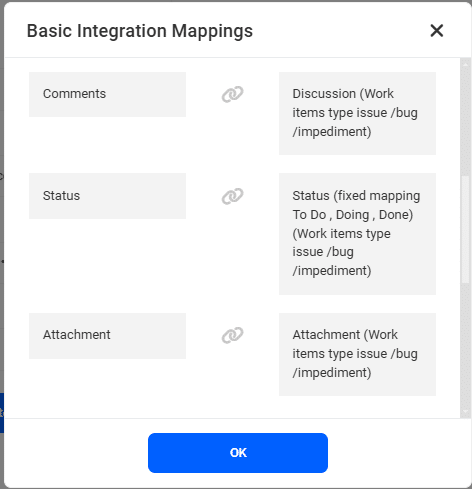
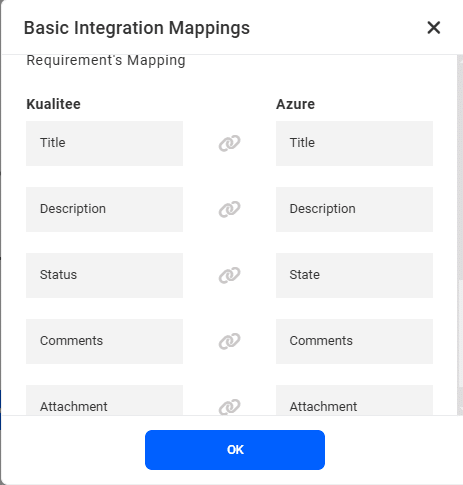
The basic mapping is a hard-coded field to field mapping between Kualitee and Azure. Below is a table that shows the mapping for each field.
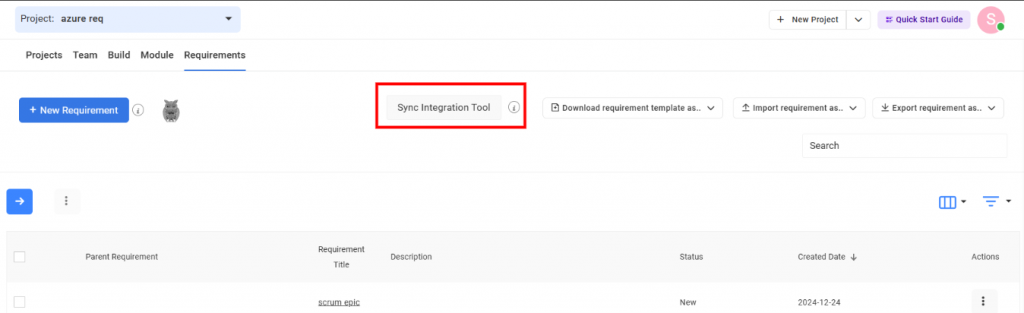
To sync requirements from Azure, go to Kualitee’s requirement screen and click on sync button and to sync issues/bugs go to defect screen and click on sync integration button
Test Case Synchronization
In addition to synchronizing Requirements, Issues, Bugs, and Impediments, Kualitee now supports two-way synchronization of Azure Test Plans Test Cases. This enhancement allows teams to keep test cases synchronized between Azure DevOps and Kualitee, ensuring that updates made in either application are reflected in the other.
Project Mapping
Before synchronizing test cases, ensure that your Azure integration has been configured and the appropriate Azure Project has been mapped to a Kualitee Project.

Synchronize Test Cases
To synchronize Azure Test Cases with Kualitee:
- Navigate to the Test Cases module in Kualitee.
- Click the Sync Integration tool button.
- Select Plugin name
- Select Azure Test Plan
- Select Azure Test Suite
- Click on Sync button


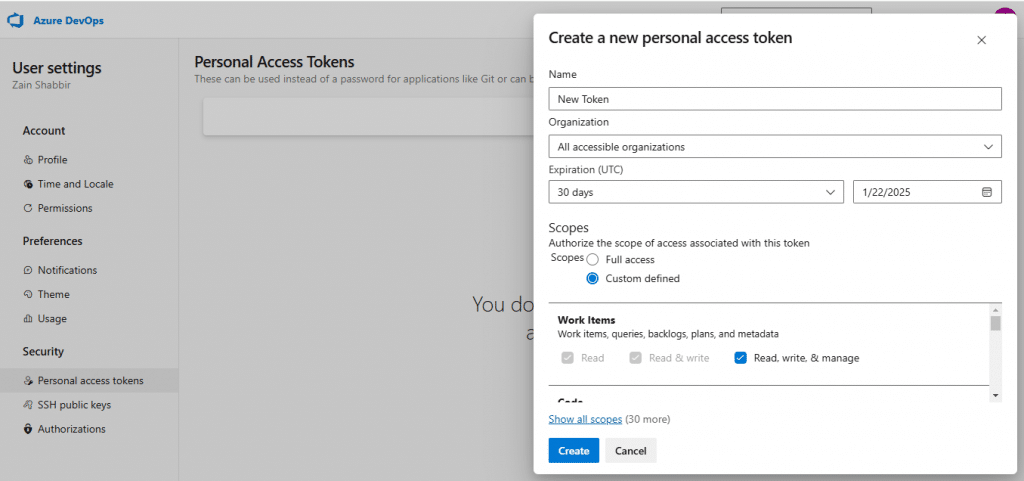
Azure token generation steps:
Navigate to Azure User settings
Click on Personal Access token
Click on +New token Enter token name
Select All accessible organizations from Organization dropdown
Select Token Expiration Dates
For Scope Select custom defined and select all check boxes manually
Click on Create
Integration using OAuth
To configure the Azure DevOps integration using OAuth, ensure that you have the required credentials from your Microsoft Azure Portal before proceeding.
The following information is required:
- Entra Application (Client) ID
- Entra Client Secret
- Directory (Tenant) ID
- Azure DevOps URL

Steps to Create Integration with OAuth
- Navigate to Settings → Integration in Kualitee.
- Click Create Integration and select Azure DevOps.
- Select OAuth from the Auth Type dropdown.
- Enter the Entra Application (Client) ID, Entra Client Secret, Directory (Tenant) ID, and Azure DevOps URL obtained from your Azure configuration.
- Click Save to create the integration.
- Once the integration is created successfully, proceed with Project Mapping to map your Kualitee project with the corresponding Azure DevOps project by clicking on Edit button under actions.
- On mapping screen, click on Connect Microsoft button to establish the connection.

User Guide
-
Dashboard
-
Project Management
-
Risk-Based Testing
-
Test Management
-
Hootie
-
Test Lab
-
Defect Management
-
Task Management
-
Reports
-
Insights
-
Settings
-
Integrations
-
SAML Authentications
-
Test Case Repositories