


Custom Labels
The Custom Labels feature allows users to create and assign personalized labels to Requirements, Test Cases, and Defects for better organization and tracking. Labels can be created directly from their respective screens or from the settings menu.
How to Use Custom Labels
Creating a Custom Label from a Requirement, Test Case, or Defect Screen
1. Navigate to the Requirement, Test Case, or Defect where you want to create a label.
2. Expand the Additional details dropdown
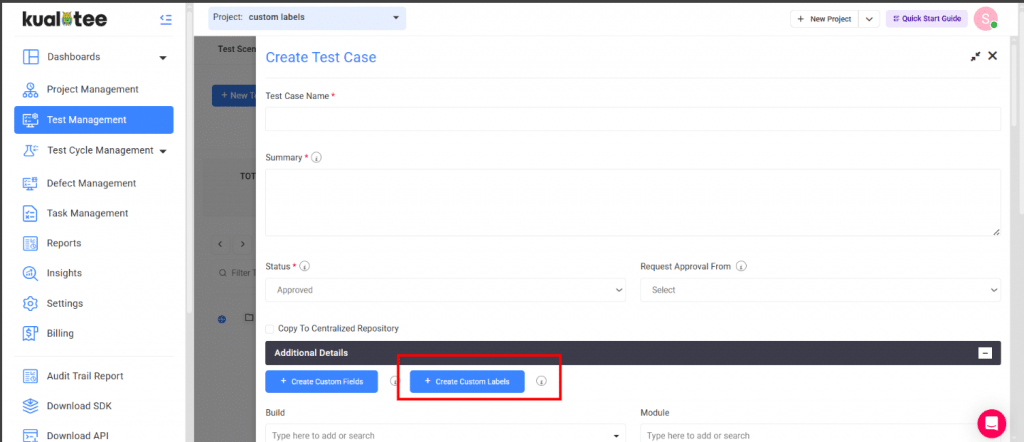
3. Click on the Create Custom Labels button
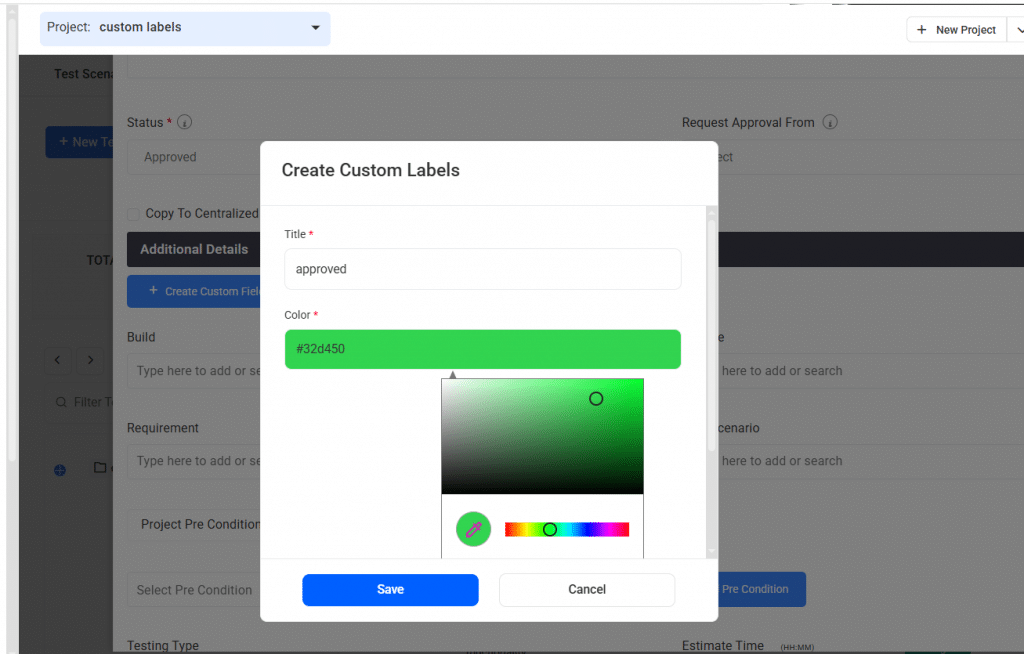
4. Enter a Label Title.
5. Choose a Color for the label.
6. Click Save.
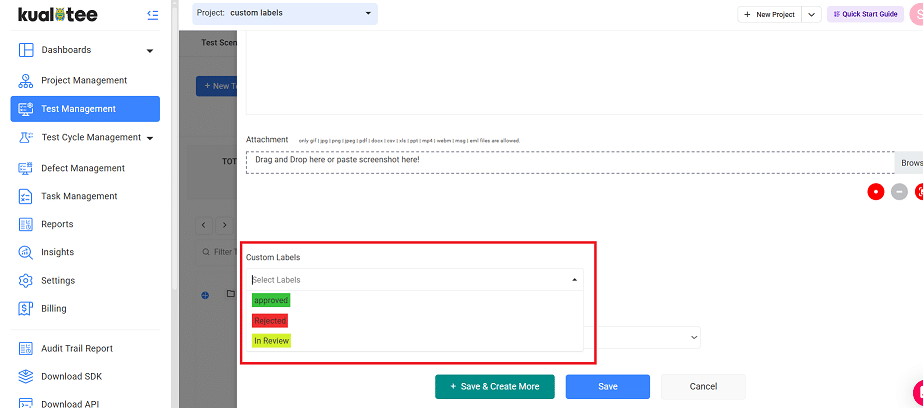
Custom label field will be available in the module where you can select your labels.
Creating a Custom Label from Settings
1. Go to Settings.
2. Click on Configurations > Custom Labels.
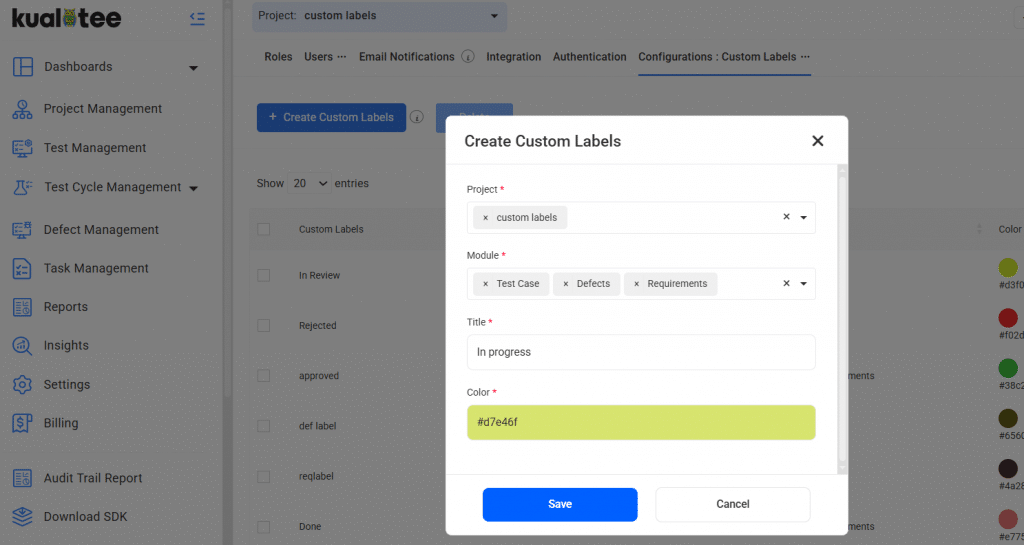
3. Click on Create Custom Labels button
4. Select the project in which you want to add custom labels
5. Select module in which you want to add custom labels
6. Enter a Label Name.
7. Choose a Color.
8. Click Save.
Labels created from settings will be available for use in Requirements, Test Cases, and Defects.
Managing Custom Labels
- To edit a label, go to Settings >Configurations > Custom Labels, click on the label, update the module or color, and save.
- To delete a label, click on the delete icon next to it in the Actions column
User Guide
-
Dashboard
-
Project Management
-
Test Management
-
Hootie
-
Test Lab
-
Defect Management
-
Task Management
-
Reports
-
Insights
-
Settings
-
Integrations
-
SAML Authentications
-
Test Case Repositories