


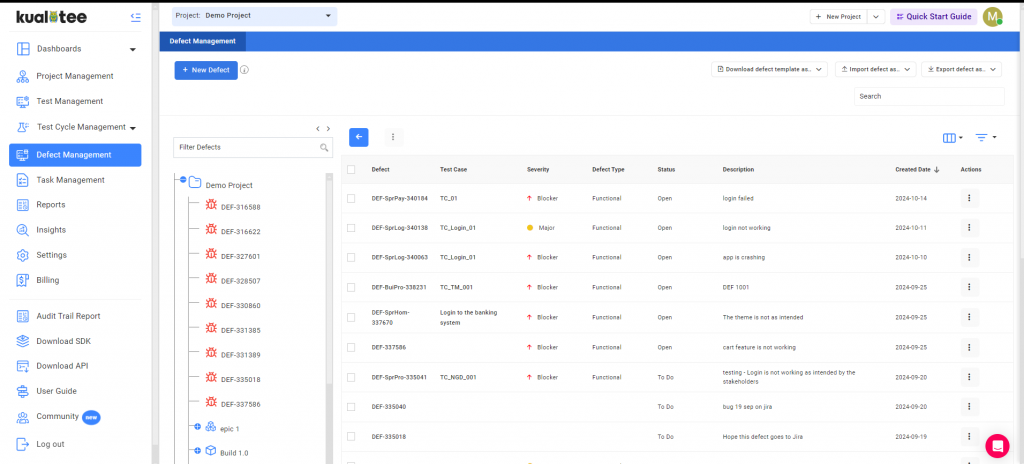
Defect Management
Defect Management gives you a detailed picture of the type of defects. You can capture a bug by reporting different aspects of abnormalities in our information-rich format. You can further manage your defects by approving, assigning to developers, rejecting, and logging comments for future references. Bugs can be tracked in multiple ways, simplifying the process manifold through different viewing formats. You can monitor the bug history at any time with multiple information pointers.
Creating Defect
Ensure that a project has been selected and then move to defect management by clicking on the left side pane.
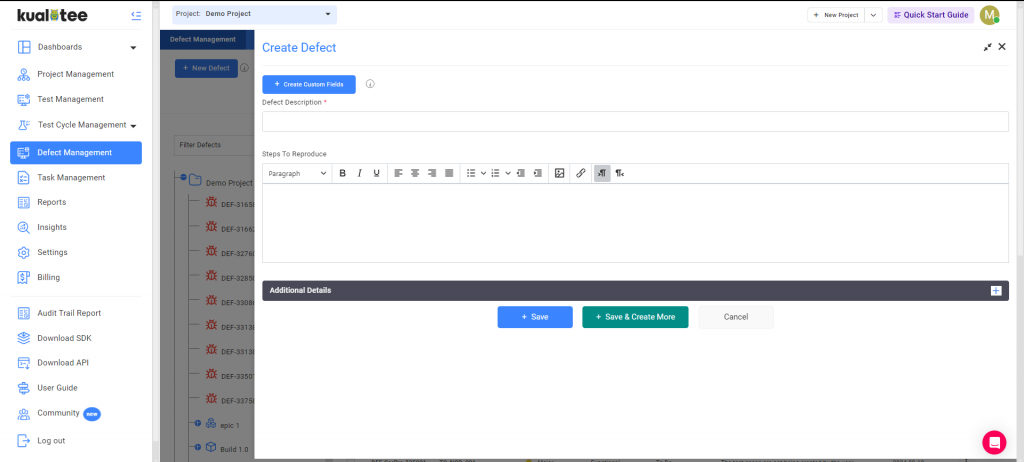
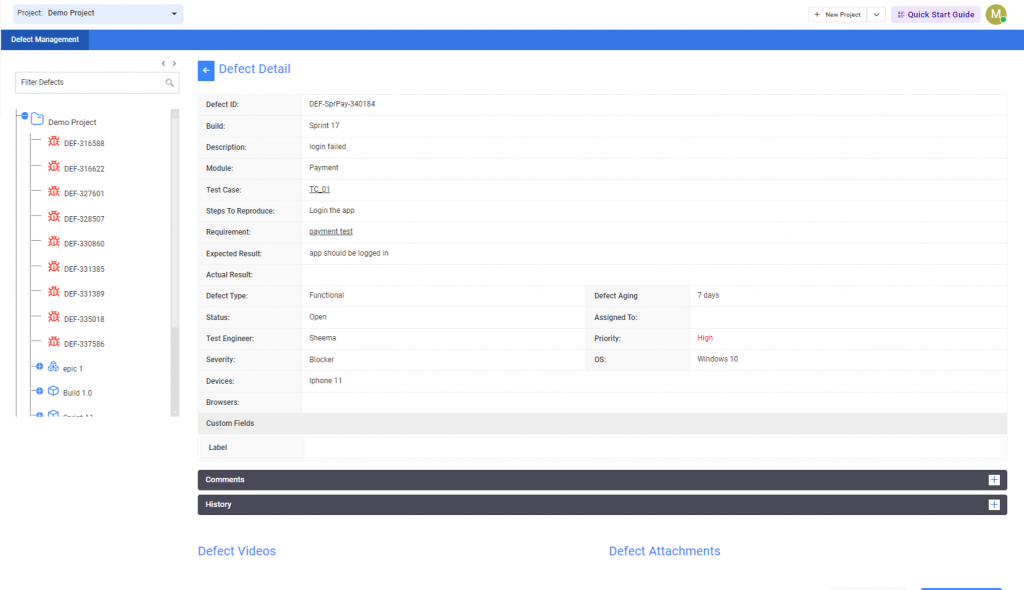
Defects Ids are auto-generated. You have to add the defect description. But we have the following additional fields in which you can add details to make the defect more specific.
You have the following fields to provide details on the defect in defect management other than defect decscription.
- Build
- Module
- Defect Type
- OS
- Severity
- Status
- Steps to Reproduce
- Actual Result
- Expected Result
- Comments
- Assign to
- Priority
- Attach Video
- Attach multiple images
- If you have integrated with JIRA, also select the JIRA user
Clicking on the Save button will create the defect.
Import and Export of Defect
Additionally, you can also import your already created defects, you can either upload your own copy and map the fields according to Kualitee fields using the in-app mapping wizard or you can download the template and use that to upload your list of defects.
You can export your data in three different formats CSV, Excel and Word. Clicking on any of the icons will get your file ready for export and prompt you when it is ready for download.

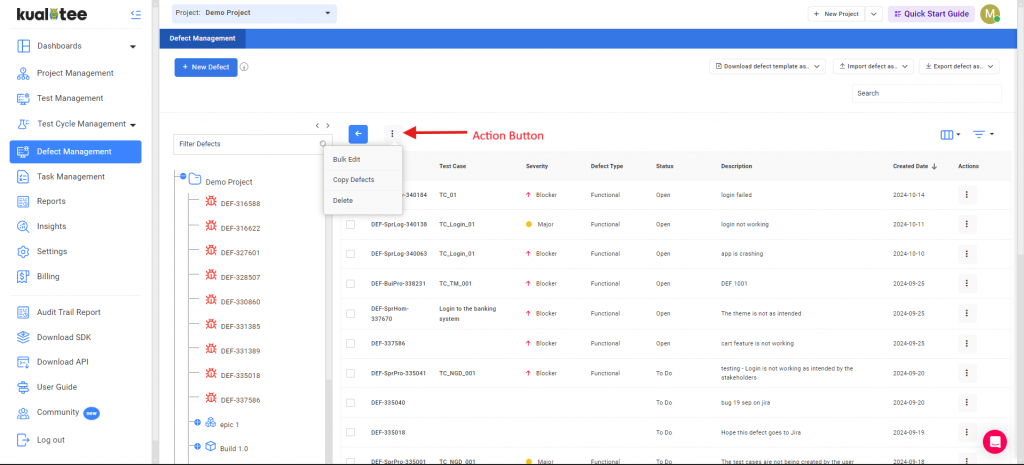
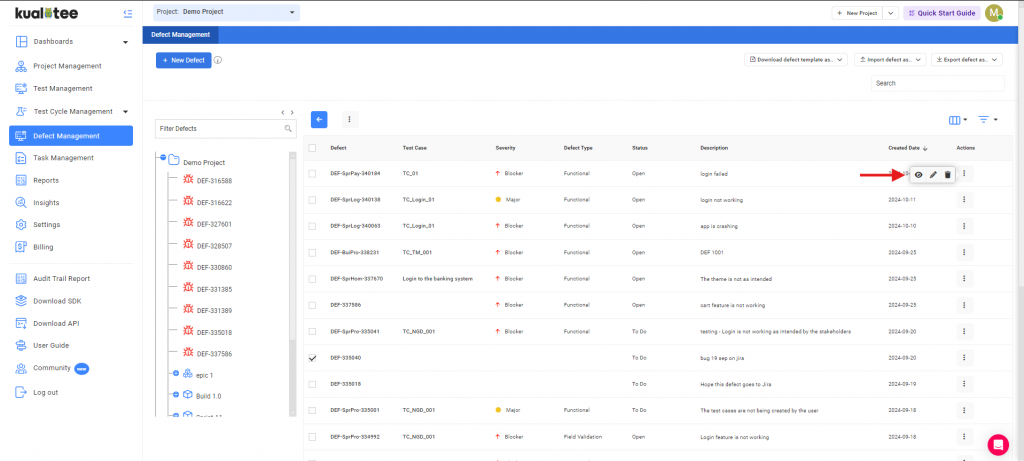
Action Button
- Delete: You can delete your selected Defects in bulk.
- Copy: You can save a copy of your selected Defects in the same project.
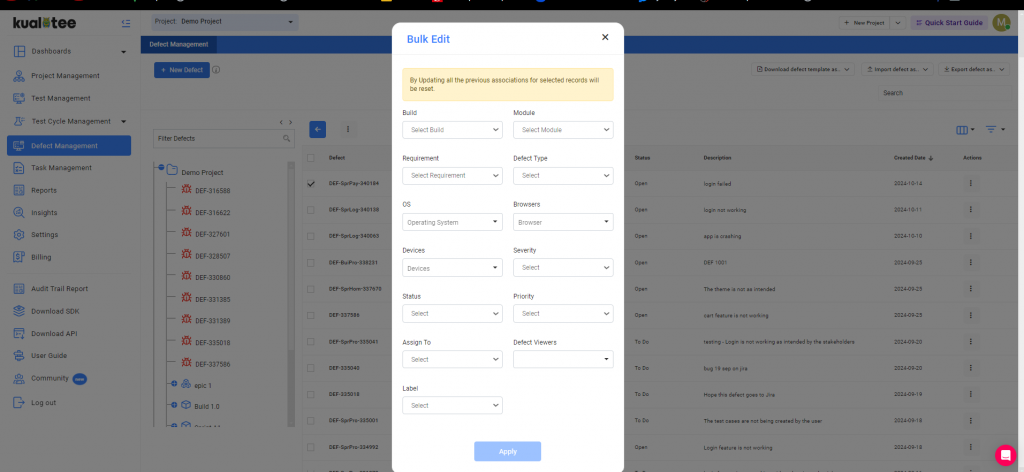
Bulk Edit
You can use the bulk edit option to change associations between data — e.g build, module and requirements associated with your defect can be changed using the bulk edit option for selected or otherwise all of the items in the listing. Also, you can edit your custom created fields too from the “Bulk Edit” option.
Note: Associations once changed cannot be reverted back to an earlier state.
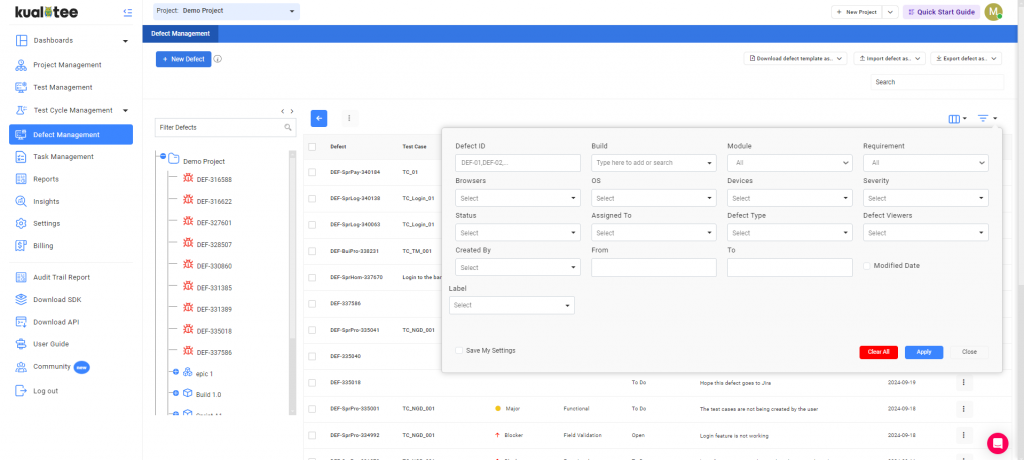
Filters
Multiple filter options are available in the Test Scenarios tab to filter out the defects.
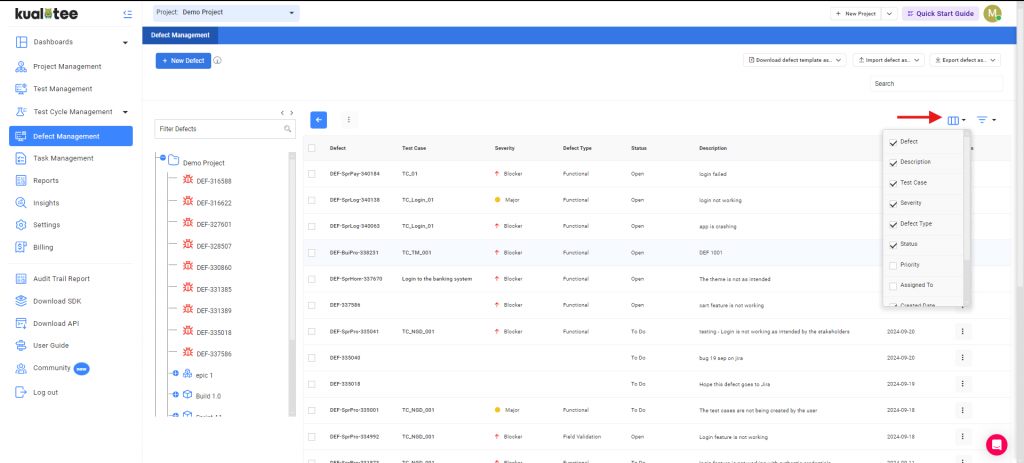
Customize Listing:
You can now view your custom fields on your listing page from the custom listing option.
To add custom fields to your listing pages, follow the steps below:
- Click on the “Custom Listing” option.
- Select the fields you want to view on your listing page, and they will be displayed.
Full View
Full view can be accessed when you review the specifics of your Defects. As you move your cursor over the action items in the corresponding column, a complete view icon will appear. Clicking on it will reveal the full view, opening up to your saved details, attachments, and comments. You can also make edits directly from this section.
User Guide
-
Dashboard
-
Project Management
-
Test Management
-
Hootie
-
Test Lab
-
Defect Management
-
Task Management
-
Reports
-
Insights
-
Settings
-
Integrations
-
SAML Authentications
-
Test Case Repositories