OVERVIEW
FEATURES


BY TEAM
BY WORKFLOW
GitLab CI/CD
Kualitee has integrated with GitLab issues and branches. This exclusive two-way integration allows you to sync your issues between Kualitee and Gitlab. Each GitLab project can be linked with a Kualitee project to sync all reported issues in both projects. Since it is a two-way integration, all updates made on the issue will automatically get synced; this includes a change in status, additional comments and association changed through Kualitee. Along with issues, you can also integrate Gitlab branches with Kualitee builds to run Pipelines within Kualitee.
GitLab Integration and Pipeline Setup in Kualitee
1. Generate Personal Access Token
- Go to your Profile.
- Navigate to Preferences.
- Open Personal Access Tokens.
- Generate a new token.

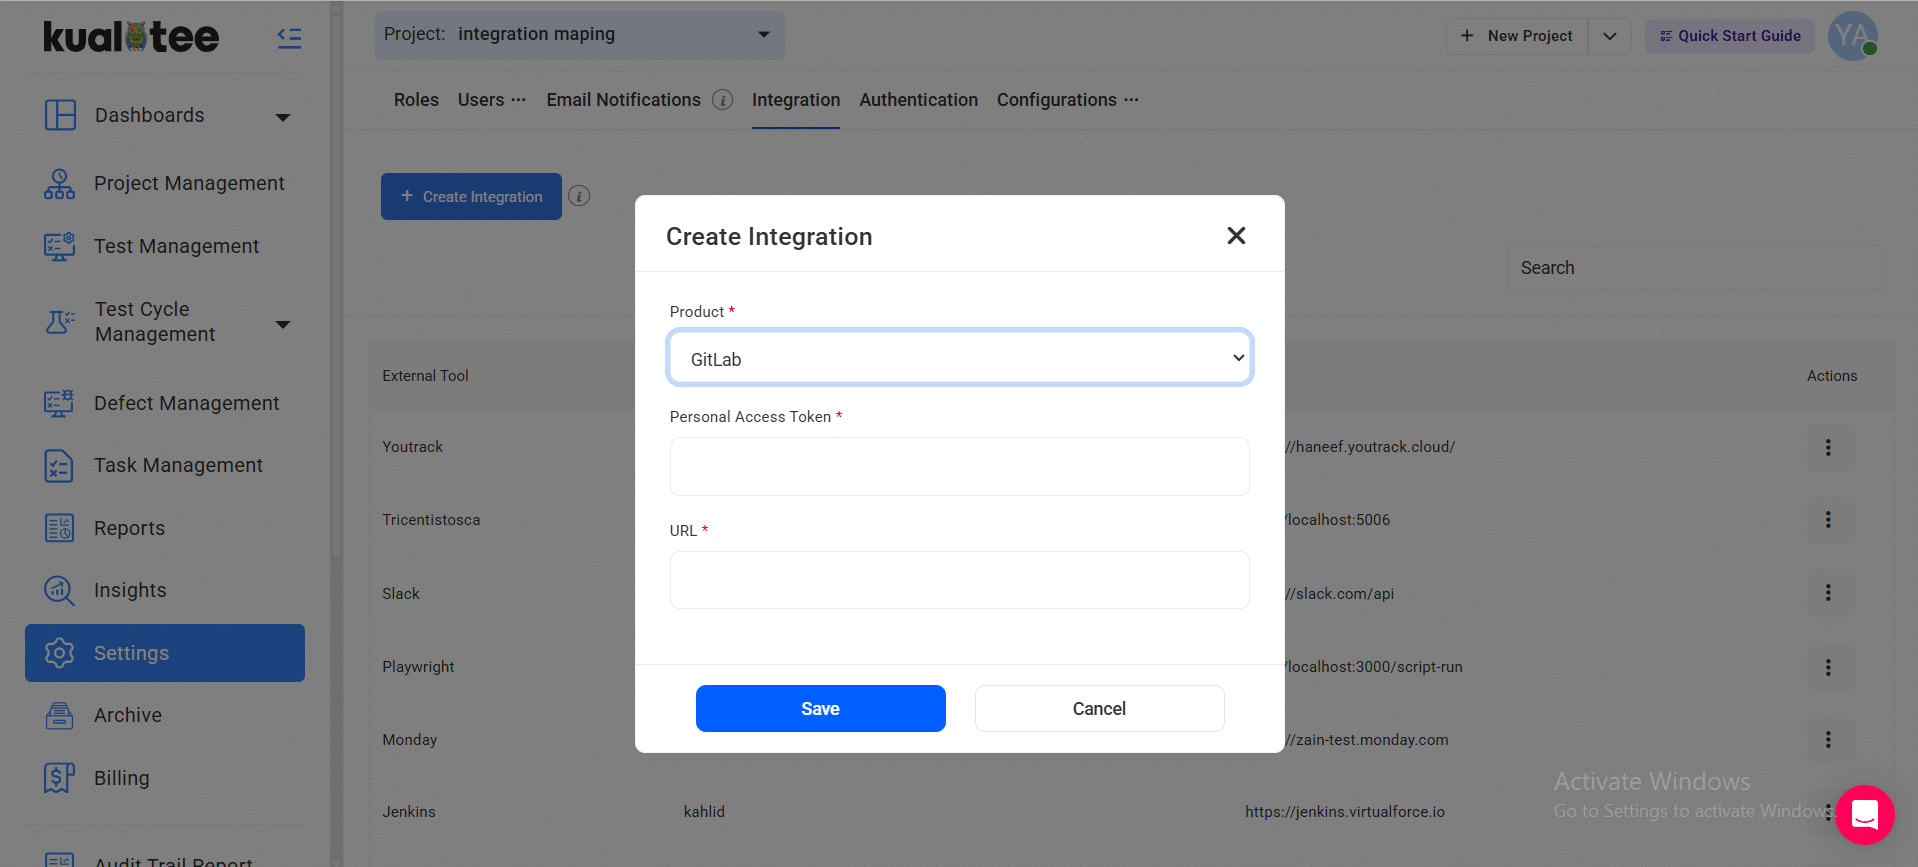
2. Create GitLab Integration
- Go to Settings.
- Select Integration from the top bar.
- Click on Create New in the External Tool Integration section.
- Select GitLab from the dropdown menu.
-
Enter the following details:
- Personal Access Token
- GitLab URL
- Click Save to confirm the integration.
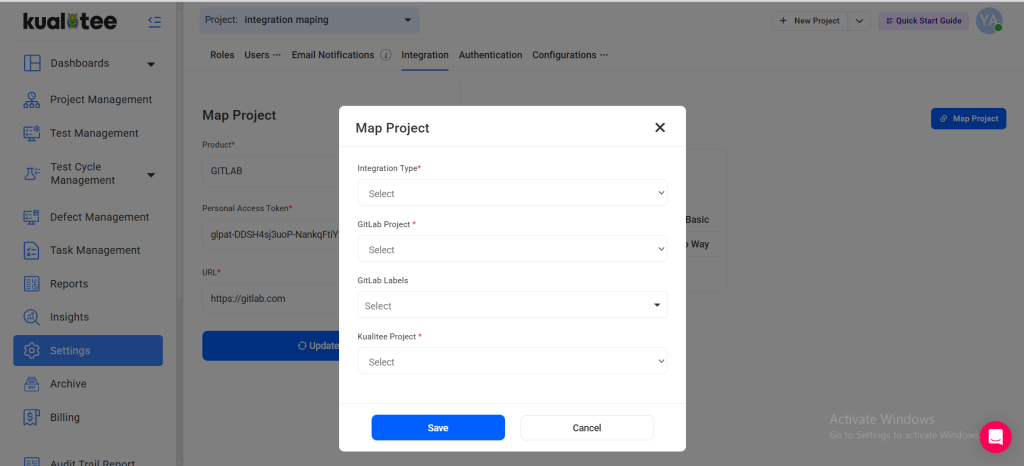
3. Map GitLab Projects
- Once the integration is created, proceed to map projects.
- Under GitLab Projects, you will see the list of available GitLab projects.
- Navigate to your Kualitee Project.
- Go to Settings.
- Click on Edit against the GitLab integration.
- Click on Map Project.
-
Provide the following details:
- Integration Type
- GitLab Project
- GitLab Labels (if applicable)
- Kualitee Project
- Click Save to complete project mapping.
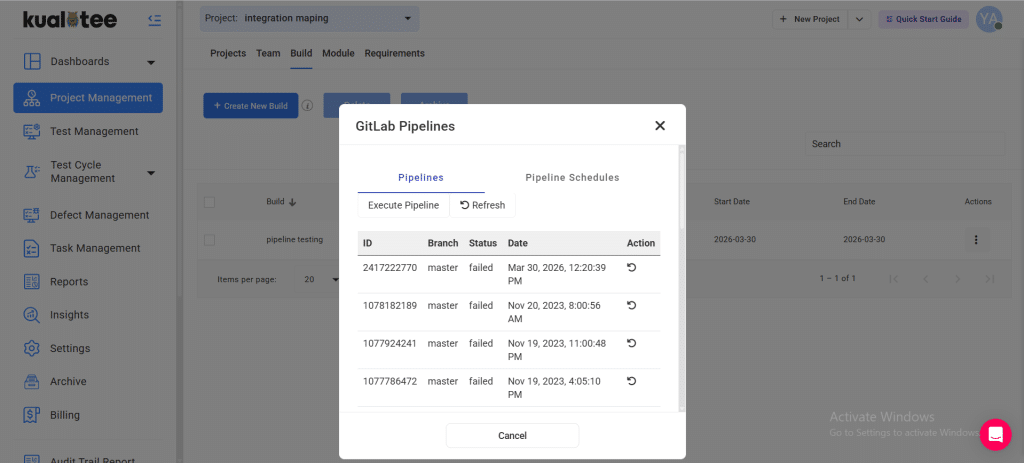
4. Run Pipeline from Kualitee
- Navigate to Project Management → Build.
- Click on the Action button against the build you want to configure.
- Select the Branch from the dropdown.
- Click Save.
- The build will be mapped successfully.
- Click on the Action button again for the same build.
- Select GitLab Pipeline to execute the pipeline.
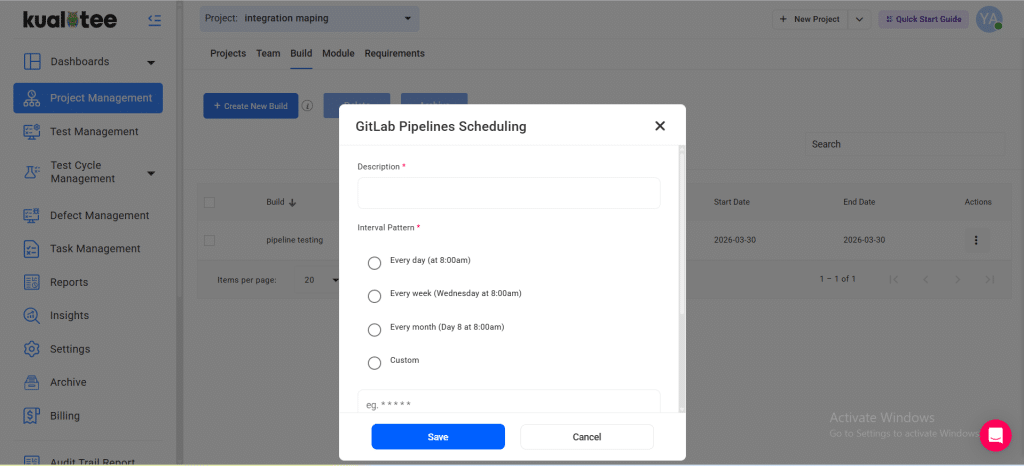
5. Schedule Pipeline
- Navigate to Project Management → Build.
- Click on the Action button against the desired build.
- Click on Schedule.
-
Enter the required details:
- Description
- Interval Pattern
- Cron Timezone
- Target Branch
- Click Save to schedule the pipeline.
User Guide
-
Dashboard
-
Project Management
-
Test Management
-
Hootie
-
Test Lab
-
Defect Management
-
Task Management
-
Reports
-
Insights
-
Settings
-
Integrations
-
SAML Authentications
-
Test Case Repositories