

AI Test Management
Hootie is Kualitee’s very own AI test management assistant. It automates and simplifies both the creation and execution of test cases. So, stop wasting time on manual processes because Hootie handles them for you.
With Kualitee’s AI features, you can input your requirements and test scenarios in text, in the form of UI screenshots, or provide your business requirements document. After that, Hootie will generate detailed test cases in either Gherkin or textual form (depending on which option you choose).
Once created, you can also execute these test cases with Hootie. It will run them, update statuses automatically and log defects when needed.
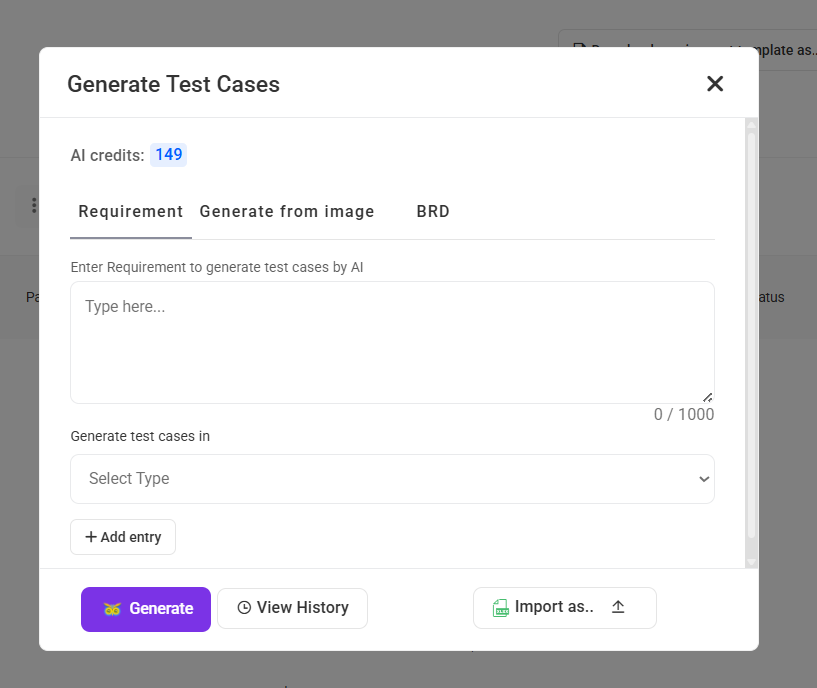
Creating Test Cases with Requirements
1- Provide your requirements and test scenarios. You can do that by typing them or by importing your requirement sheet. After that, select the test case generation type and hit Generate.
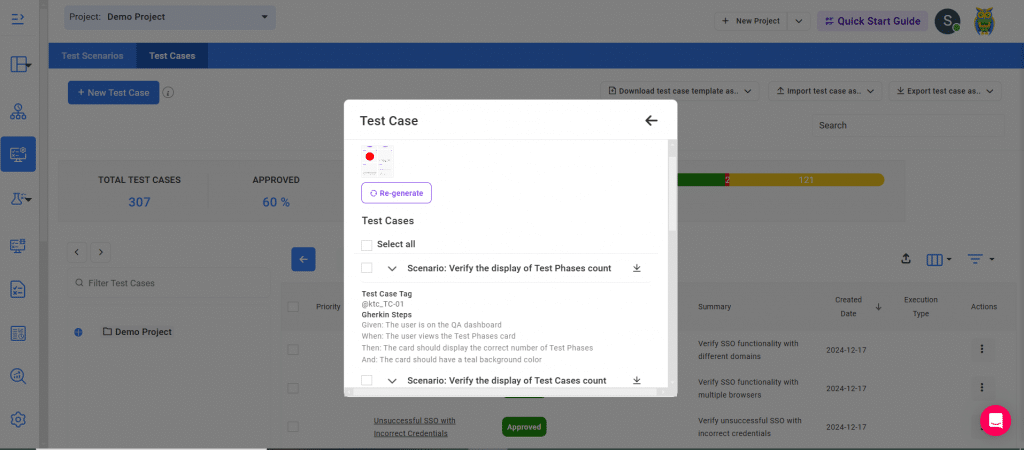
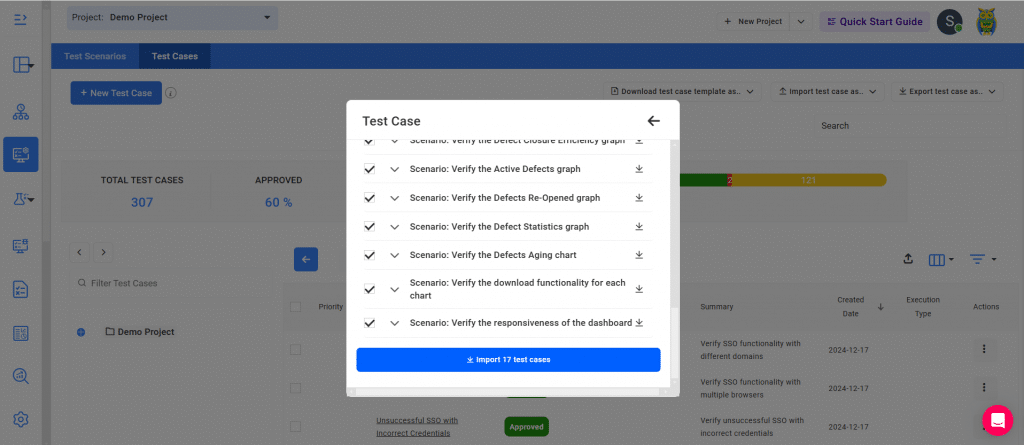
2- Let AI do the work next. It will analyze your input and generate a set of test cases.
3- Review the generated test cases. Make adjustments if needed. And import the cases directly into your project.
Creating Test Cases Using Images/UI Screenshots
1- Select the option “Generate from Image.”
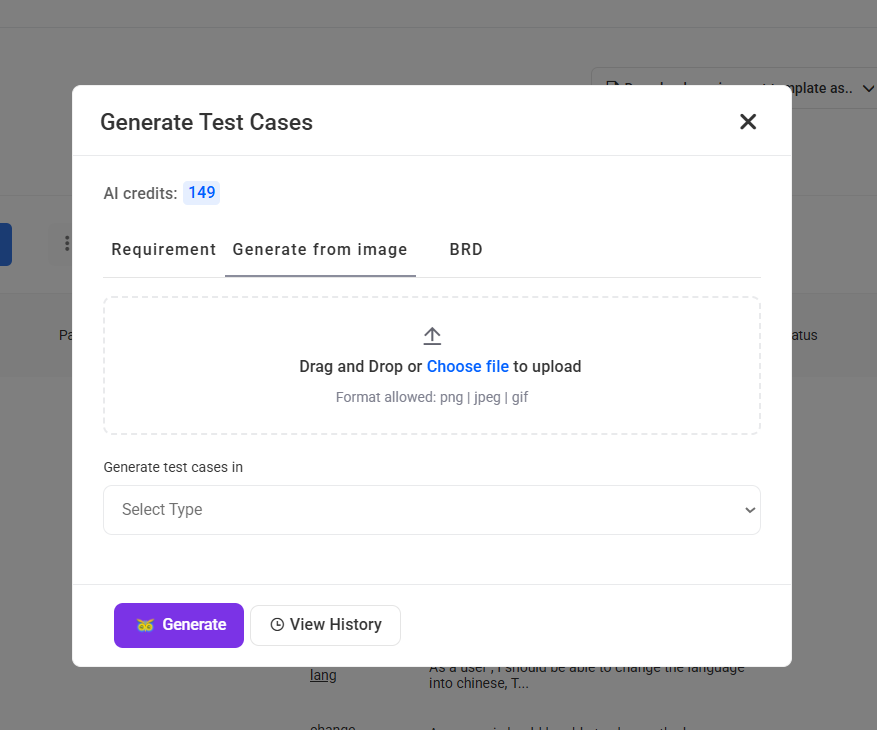
2- Upload your image and choose the format you want the test cases to be generated in (Gherkin or textual).
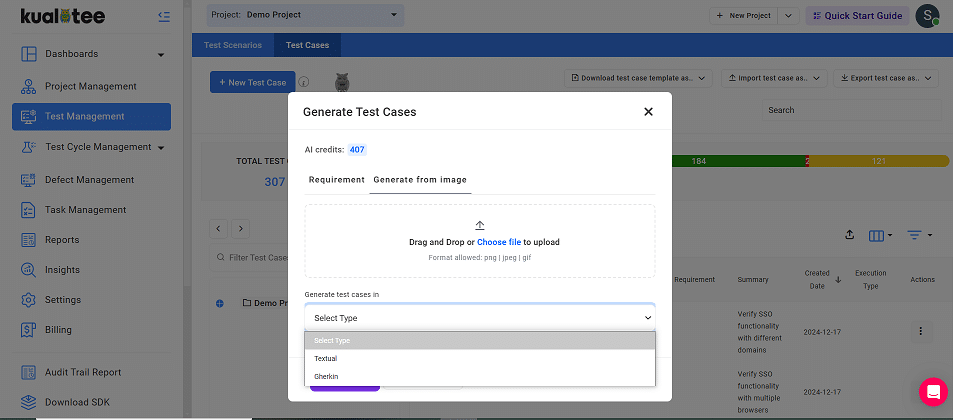
3- Click on Generate, and your test cases will be created automatically.
4- Adjust the cases if needed and import them into your project.
Creating Test Cases from BRD Documents
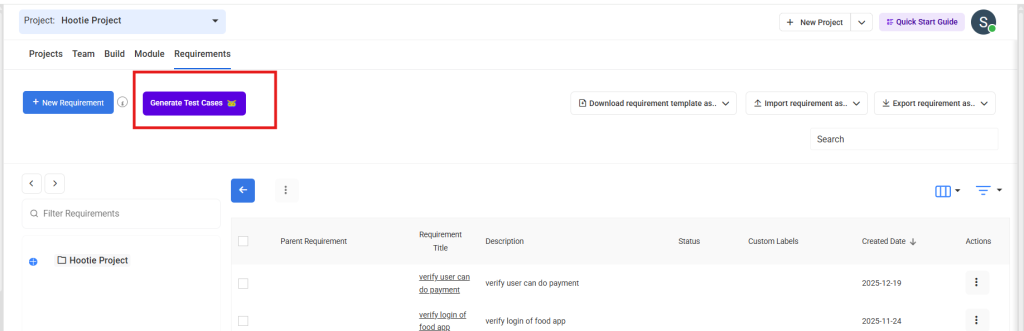
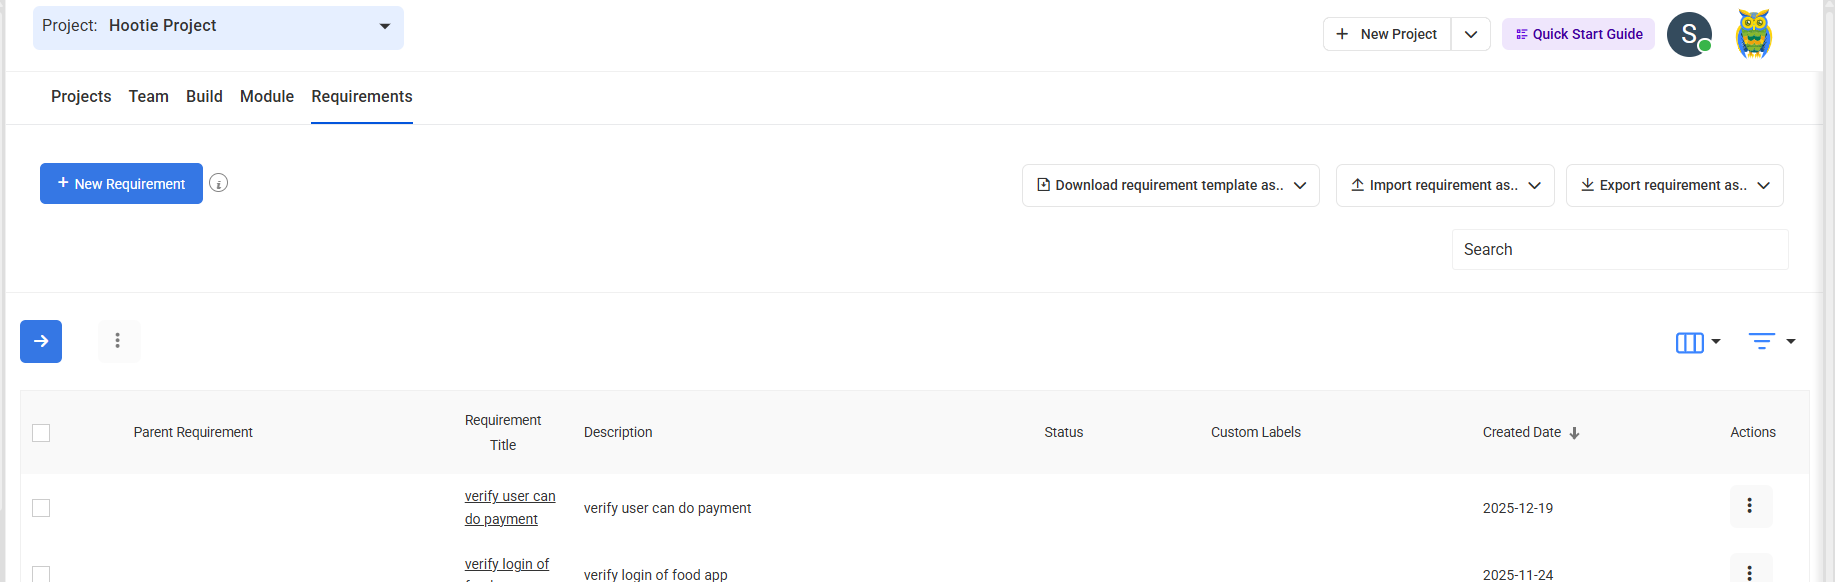
1- Head to the Requirements section from the project management tab and click on Generate Test Cases.
2- In the generation window, you’ll see three tabs. Select the BRD tab, where you’ll find the option to upload your document and specify the output format.
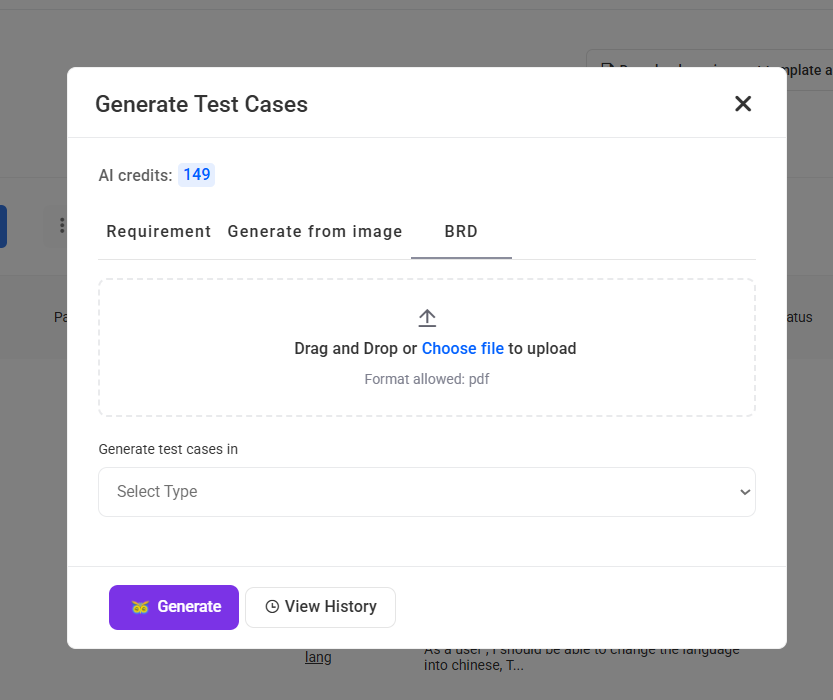
3- Upload your BRD file in the PDF format. Then, pick whether you’d like your test cases to be produced in Textual or Gherkin format using the dropdown.
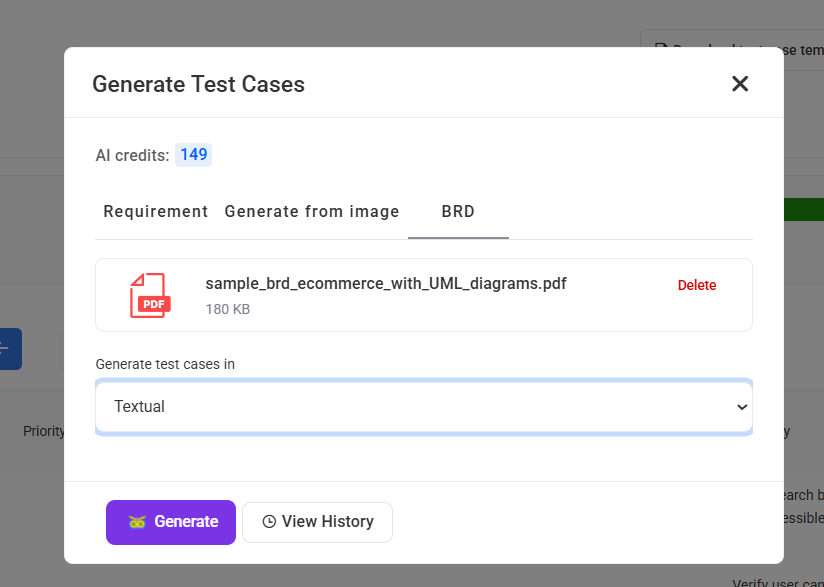
4- Once the setup is complete, press Generate. Hootie will begin analyzing the BRD and extracting requirements. While this is in progress, you’ll notice the Hootie icon blinking at the top right. This means the document is still being processed. When it stops blinking, click on the icon.
5- A new window will open, showing your uploaded BRD with a View option next to it. Select View to proceed.
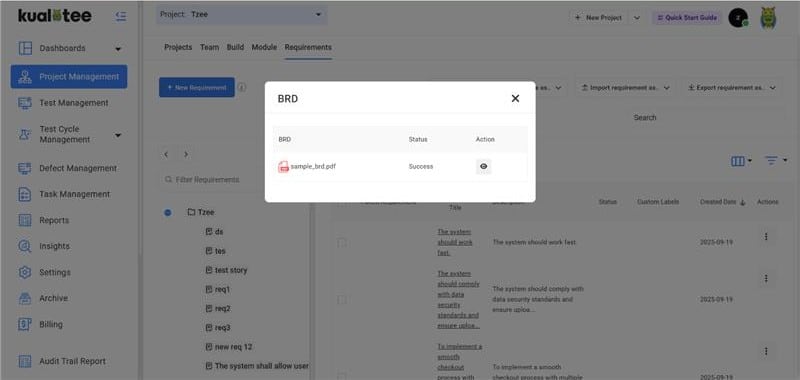
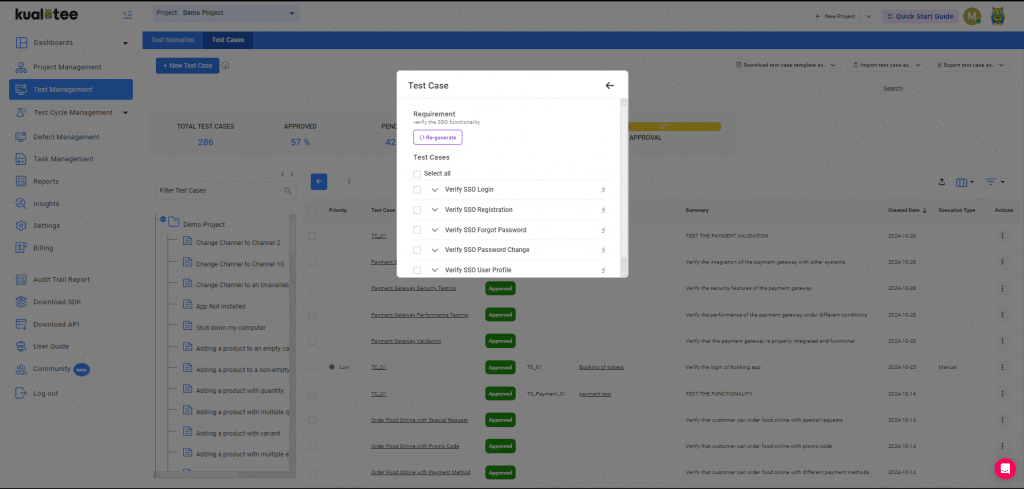
6- The extracted requirements will now be displayed in a list format. Select the items you want to create test cases for and then press Generate Test Cases.
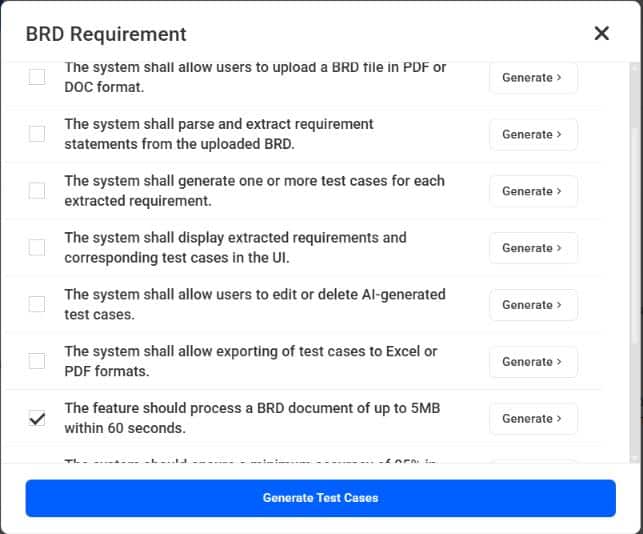
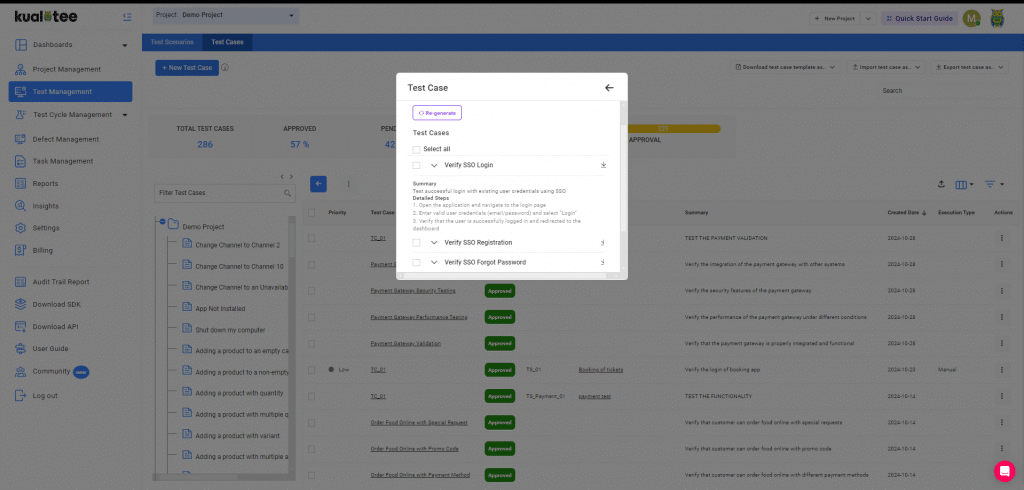
7- Hootie will generate test cases against the requirements you’ve chosen. Within a few moments, you’ll be able to click View and review them.

Executing Test Cases with Hootie
We’ve added the AI-powered test execution feature to Hootie. Once your test cases are created, you can also run them automatically.
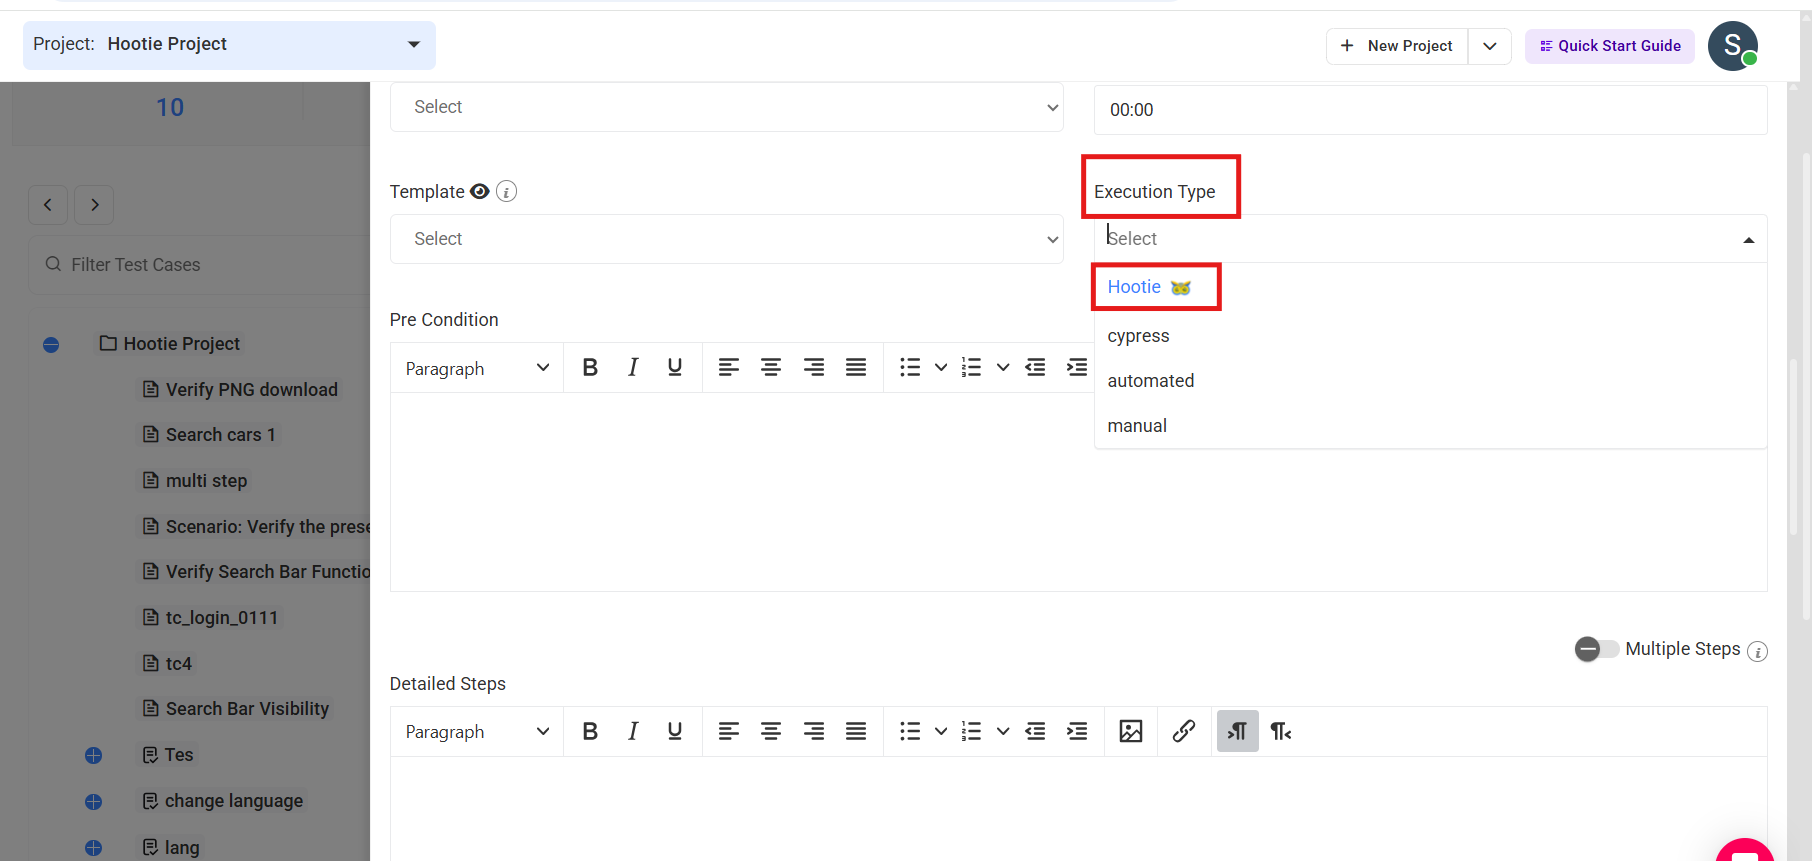
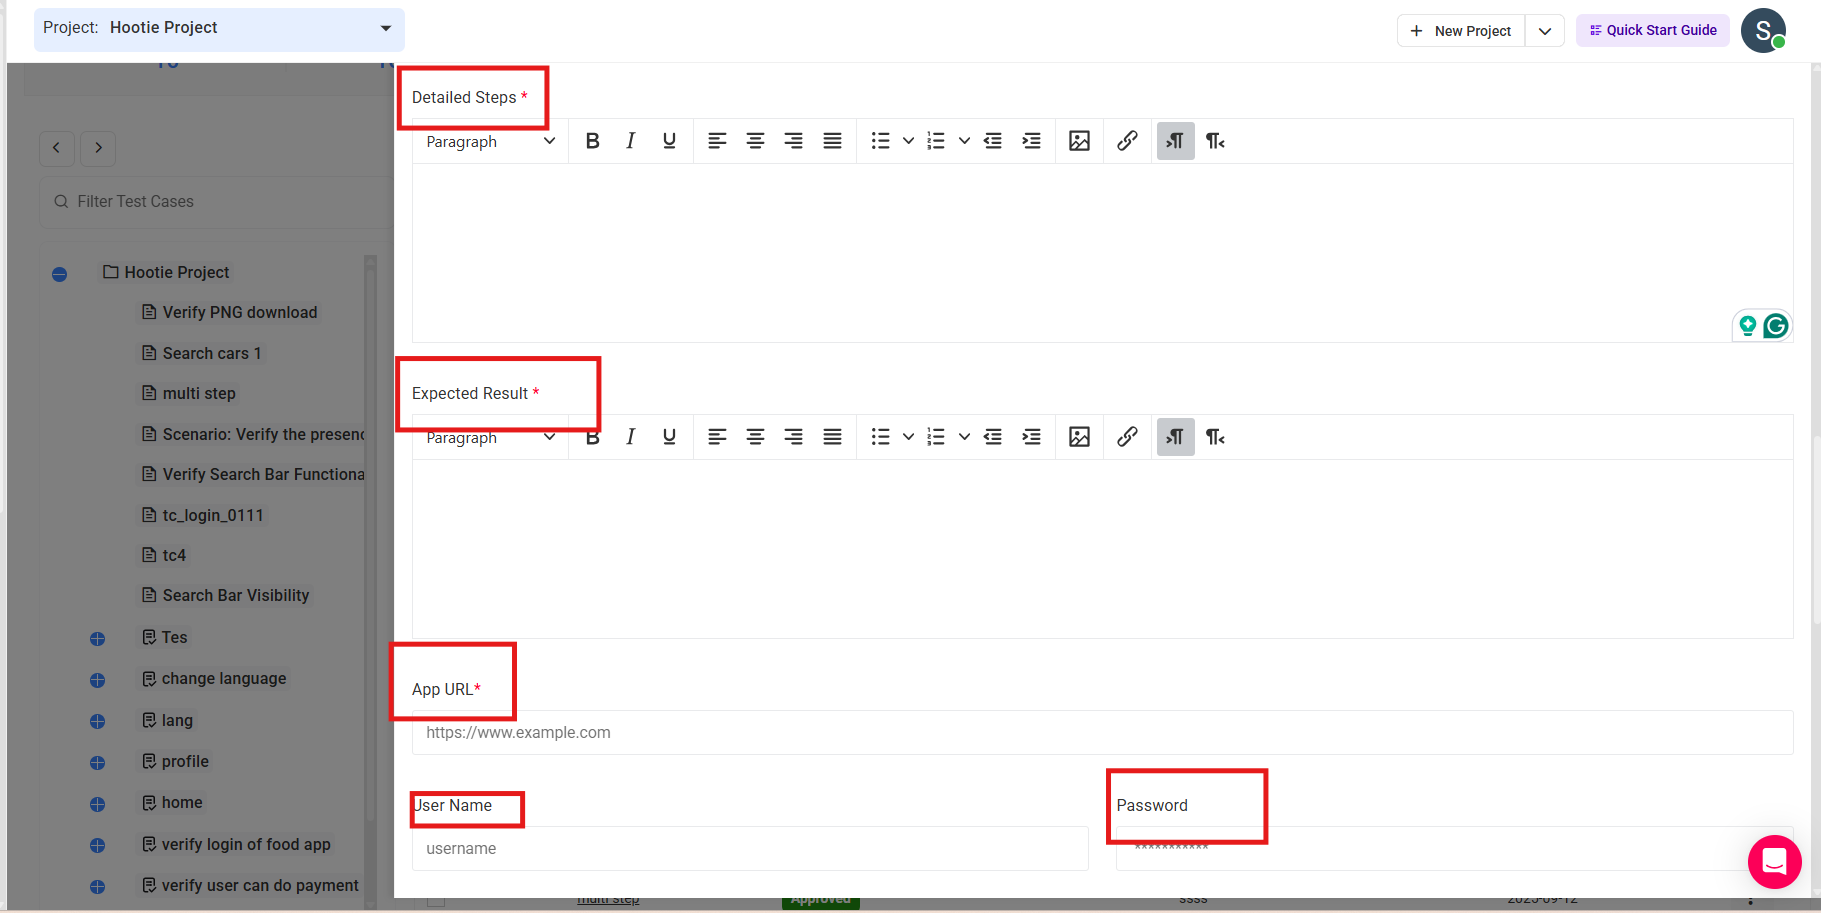
1- Navigate to the test case creation screen. Then, define the test cases with detailed steps, expected results and application credentials. You also have to select Hootie as the “Execution Type”.
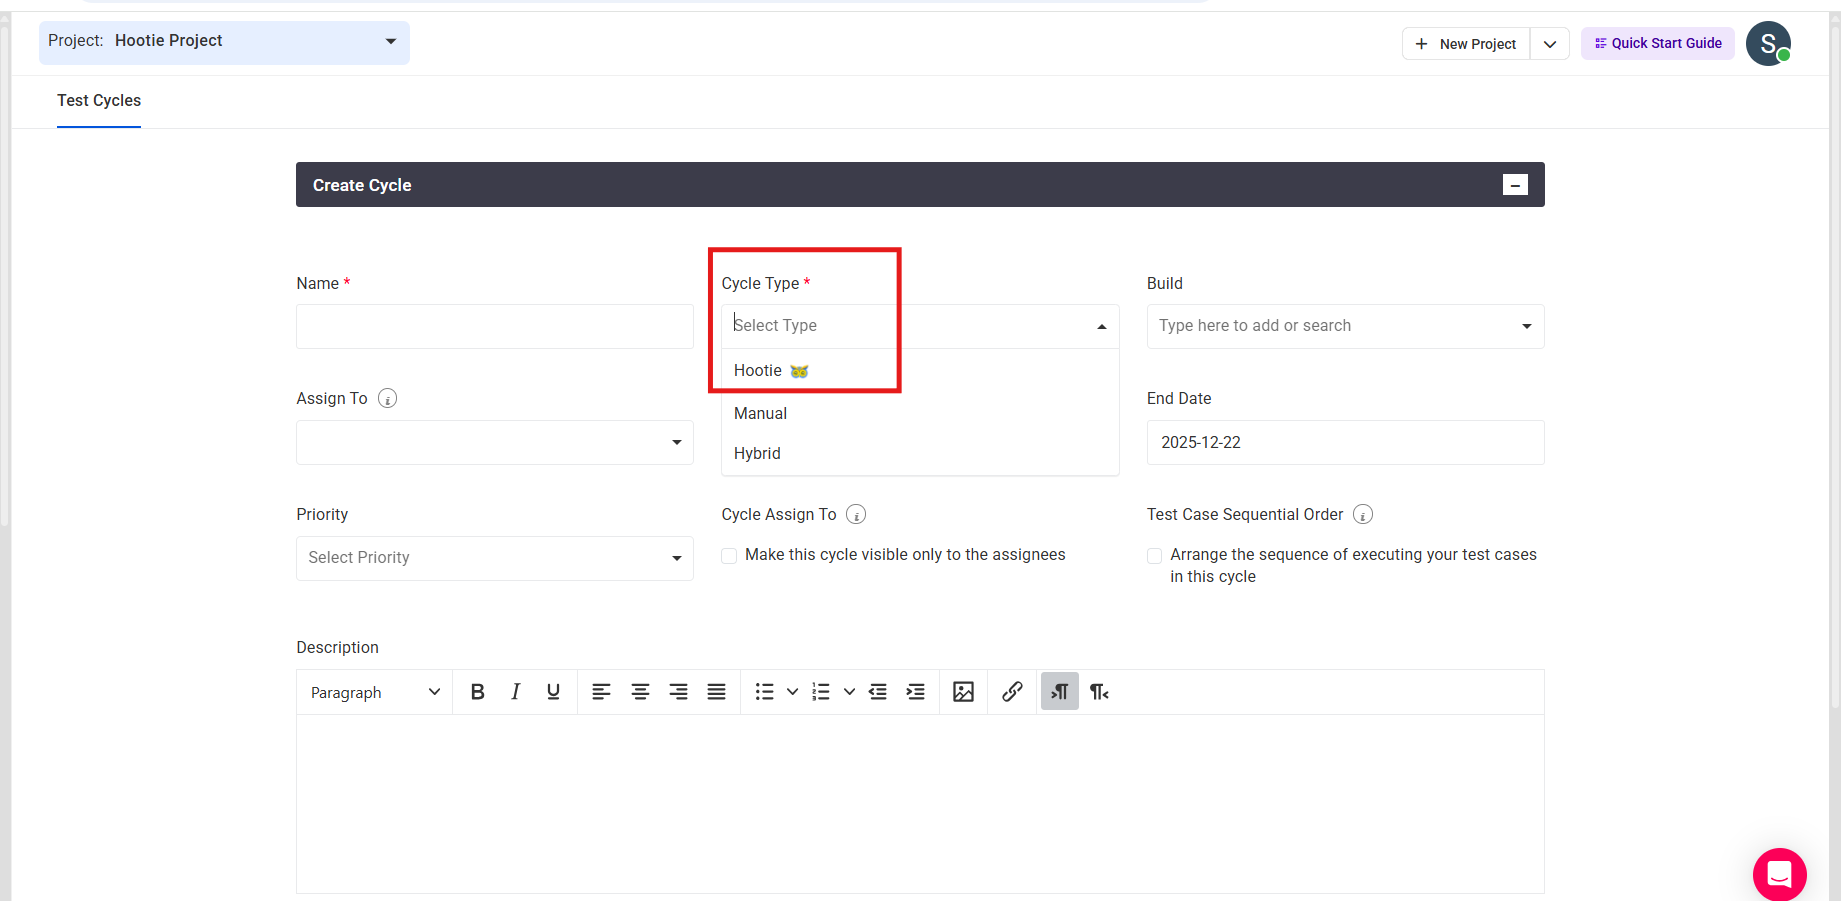
2- Go to Test Cycle Management > Test Cycles section.
3- Now, click on Create New Cycle and select “Hootie” as the cycle type. Then, fill out all the fields. Once that’s done, add your test cases to the cycle you just created.
4- Navigate back to the cycle listing screen and click on the Actions button. Once that’s done, select the Hootie icon to start the automated execution of the entire cycle.

5- After the execution is complete, test statuses will be updated instantly.
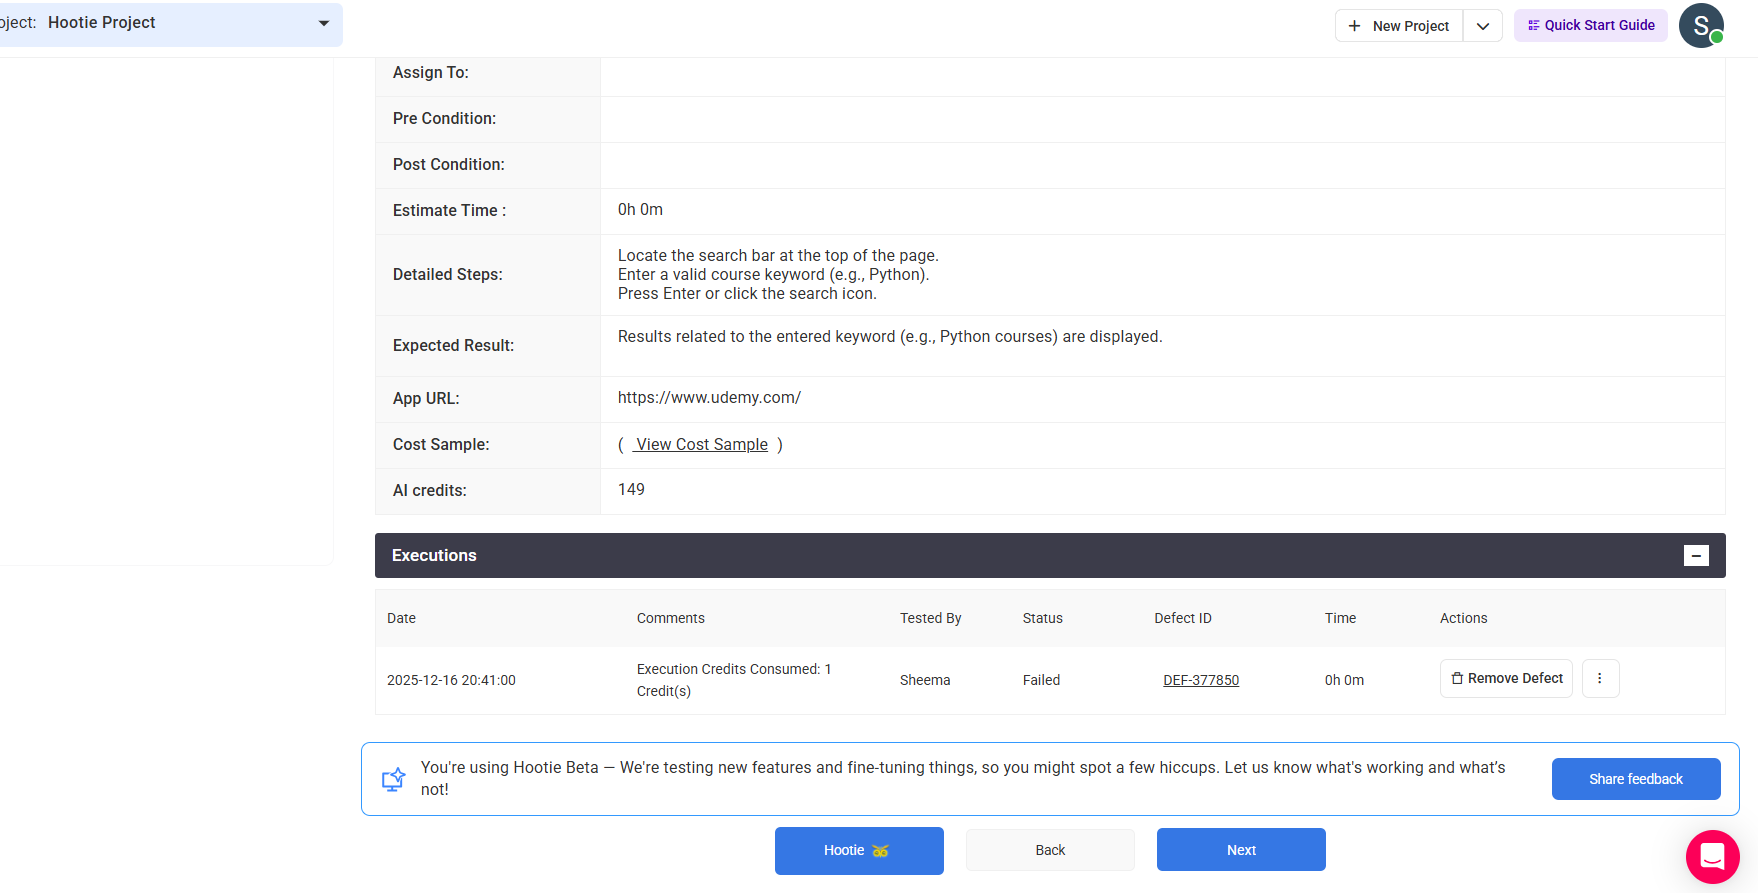
If a test fails, Hootie will log a defect automatically and attach the relevant details to the test cases.
Benefits of AI-powered Test Case Generation & Execution
- No more tedious manual tasks. You can focus on other high-level testing strategies.
- AI reduces the risk of human error. It ensures a thorough testing coverage.
- Test cases are generated and executed quickly. Your entire testing process is sped up.
- Defects are logged automatically with detailed attachments. Much of your valuable time is saved.
User Guide
-
Dashboard
-
Project Management
-
Test Management
-
Hootie
-
Test Lab
-
Defect Management
-
Task Management
-
Reports
-
Insights
-
Settings
-
Integrations
-
SAML Authentications
-
Test Case Repositories